This post is about DNS flushing in Microsoft Windows 10 operating system.
- DNS flush or Ipconfig /flushdns command is not new for IT pro.
- But still lots of friends sometimes forget it during troubleshooting website opening issue.
- So this post is like reminder for How To Flush DNS on Windows 10.How To Flush DNS On Windows 10
When We Use DNS Flushing ? or Why We need to do DNS Flush ?
The most common reason for DNS Flush is website not resolving correctly and it may be an issue with your DNS cache holding an incorrect address. How To Flush DNS On Windows 10
To flush the DNS cache in Windows 10 please follow these steps:
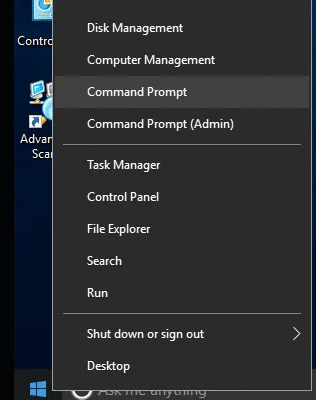
- Right Click on the Start Icon
- Click on Command Prompt

- The Windows Command Prompt Window will appear. Type in:
ipconfig /flushdns
and press ENTER - You should receive the following message:
Windows IP Configuration
Successfully flushed the DNS Resolver Cache
You can also write same command in Run Window. For That use Windows Key + R . Now type directly ipconfig /flushdns command and DNS Resolver Cache will Successfully flushed.How To Flush DNS On Windows 10

Ipconfig /flushdns command swithces
The ipconfig /flushdns command doesn’t actually have any switches. It’s a simple command designed to perform a single function: clearing the DNS cache on your computer.
The DNS cache stores website addresses (domain names) and their corresponding IP addresses. This speeds up browsing by allowing your computer to quickly access websites it’s already visited. However, if a website’s IP address changes, your computer might still try to use the old address from the cache, leading to errors. Flushing the DNS cache clears out these outdated entries and forces your computer to fetch the latest IP addresses from the DNS server.
Therefore, the ipconfig /flushdns command is designed to be straightforward and doesn’t require any additional configuration options. Just typing the command and pressing Enter will trigger the DNS cache flush.
Is it helpful ? Do comment below Yes/No.
