Windows 11’s new simplified right-click context menu has frustrated many users who prefer the classic full menu from Windows 10. If you’re tired of clicking “Show more options” every time you need advanced features, this guide shows you exactly how to get the old right-click menu back in Windows 11 permanently.
Why Windows 11 Changed the Right-Click Menu
Microsoft redesigned the context menu to create a cleaner, more modern interface. However, this change buried many commonly used options behind an extra click, making everyday tasks slower for power users and professionals.
Method 1: Registry Edit (Permanent Solution)
This is the most reliable way to restore the classic right-click menu permanently.
Step 1: Open Registry Editor
- Press Win + R to open Run dialog
- Type regedit and press Enter
- Click “Yes” when prompted by User Account Control
Step 2: Navigate to the Correct Key
Navigate to this path:codeCode
HKEY_CURRENT_USER\Software\Classes\CLSIDStep 3: Create New Key
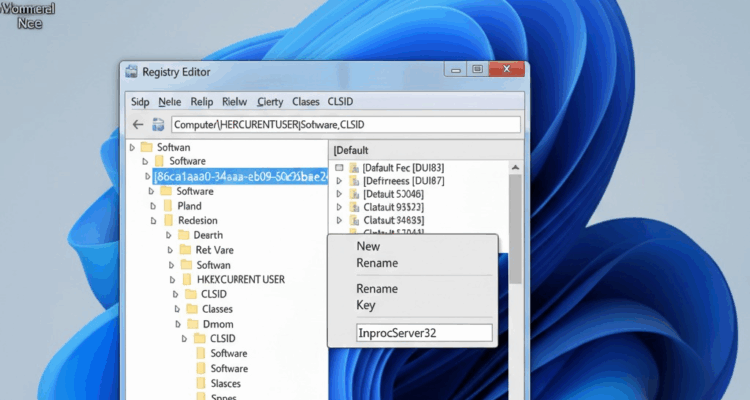
- Right-click on “CLSID” folder
- Select “New” > “Key”
- Name it exactly: {86ca1aa0-34aa-4e8b-a509-50c905bae2a2}
Step 4: Create InprocServer32 Subkey
- Right-click your new key
- Select “New” > “Key”
- Name it: InprocServer32
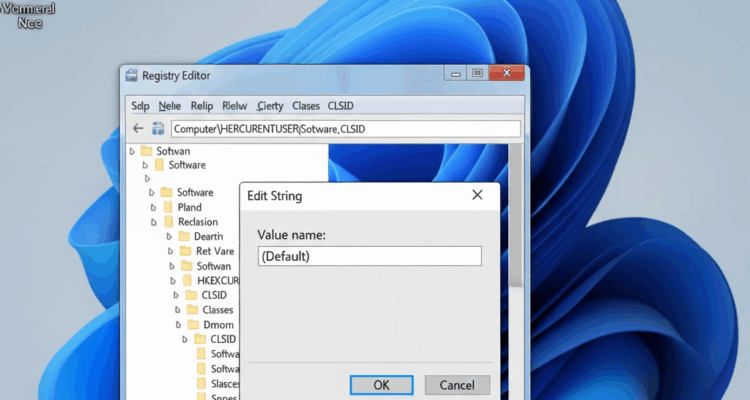
Step 5: Modify Default Value
- Click on “InprocServer32”
- Double-click “(Default)” in the right panel
- Leave “Value data” field completely empty
- Click “OK”
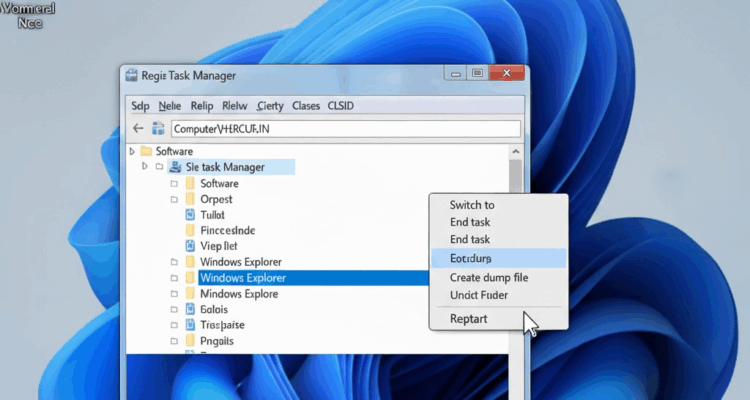
Step 6: Restart Windows Explorer
- Press Ctrl + Shift + Esc to open Task Manager
- Find “Windows Explorer” in the list
- Right-click it and select “Restart”
The old right-click menu should now appear immediately!
[Video Description]
Method 2: Command Prompt Method (Quick Alternative)
For users who prefer command-line solutions:
Step 1: Open Command Prompt as Administrator
- Press Win + X
- Select “Windows Terminal (Admin)”

Step 2: Run the Registry CommandcodeCmd
reg add "HKCU\Software\Classes\CLSID\{86ca1aa0-34aa-4e8b-a509-50c905bae2a2}\InprocServer32" /f /ve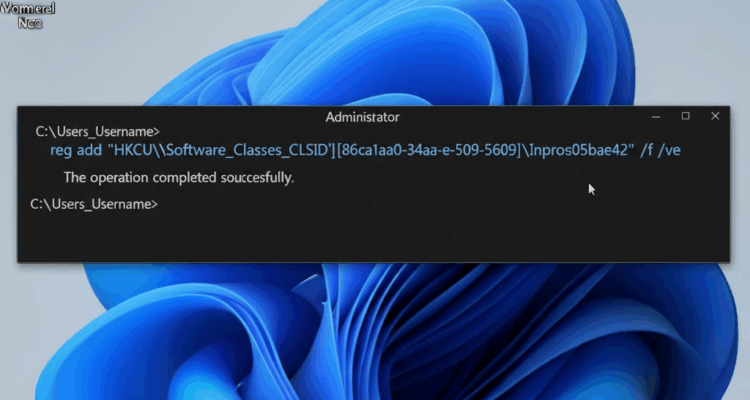
Step 3: Restart ExplorercodeCmd
taskkill /f /im explorer.exe & start explorer.exe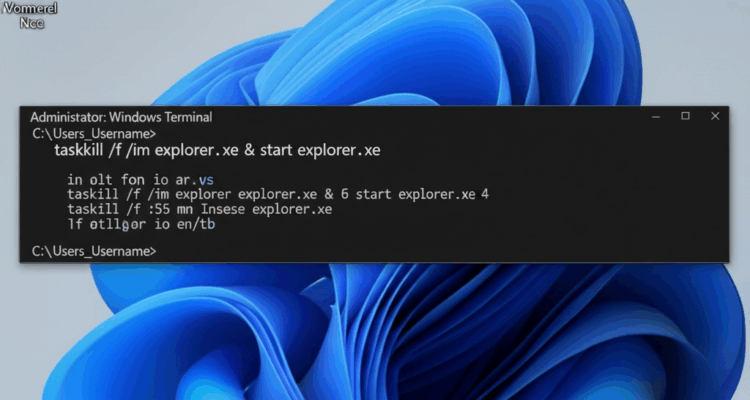
Method 3: PowerShell Script (Advanced Users)
Create a PowerShell script for automated deployment:codePowershell
New-Item -Path "HKCU:\Software\Classes\CLSID\{86ca1aa0-34aa-4e8b-a509-50c905bae2a2}\InprocServer32" -Force
Set-ItemProperty -Path "HKCU:\Software\Classes\CLSID\{86ca1aa0-34aa-4e8b-a509-50c905bae2a2}\InprocServer32" -Name "(Default)" -Value ""
Stop-Process -Name explorer -Force
Start-Process explorer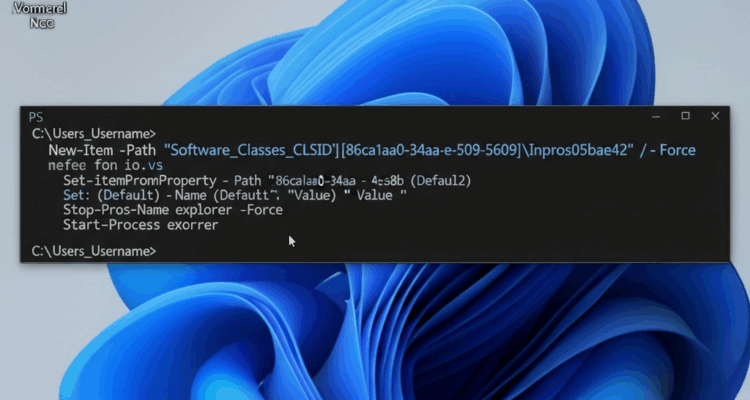
Does this helpful ? Discuss below